Create a system to emulate #
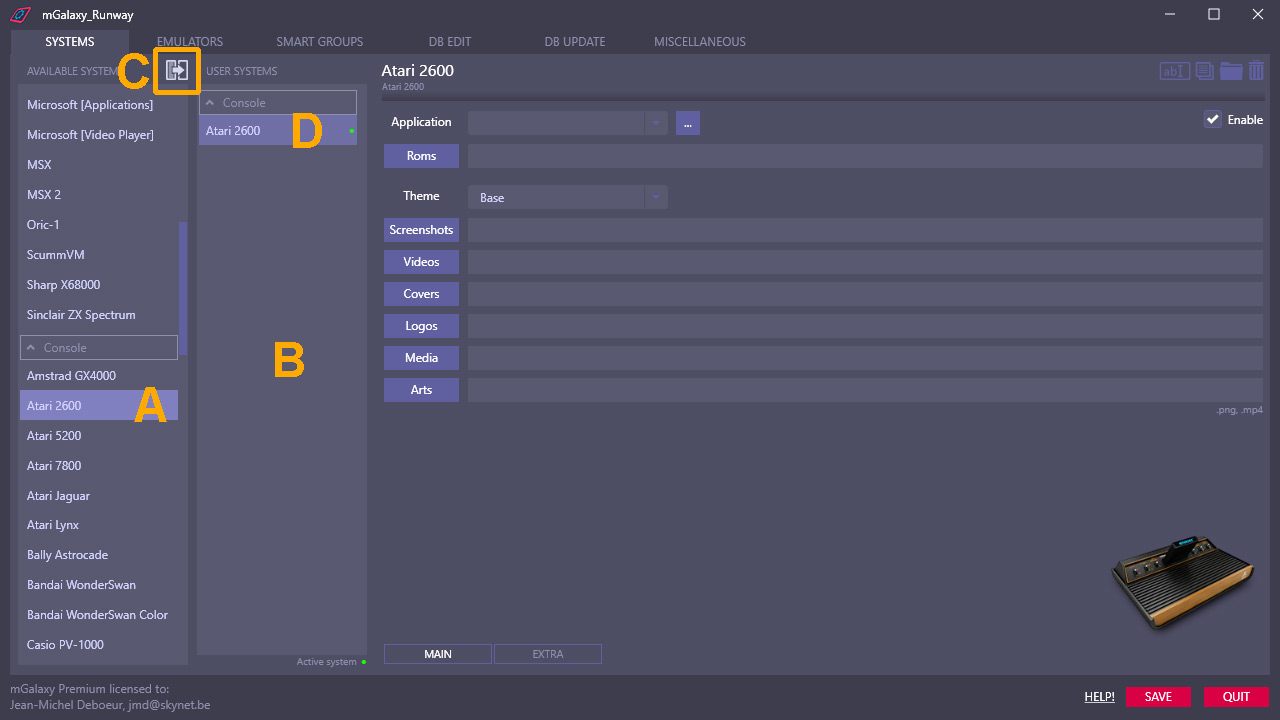 Run “mGalaxy_Runway”. It will open automatically in the “Systems” tab.
In the left column [A], all available systems.
Choose the one you want and either
Run “mGalaxy_Runway”. It will open automatically in the “Systems” tab.
In the left column [A], all available systems.
Choose the one you want and either
- drag and drop it into the column on its right [B]
- double click on it
- click on this icon [C]
Choose an emulator #
 For many systems, several emulators (an emulator is an application that will “imitate” the hardware) may be available. It may be interesting to have a look at them before making your choice.
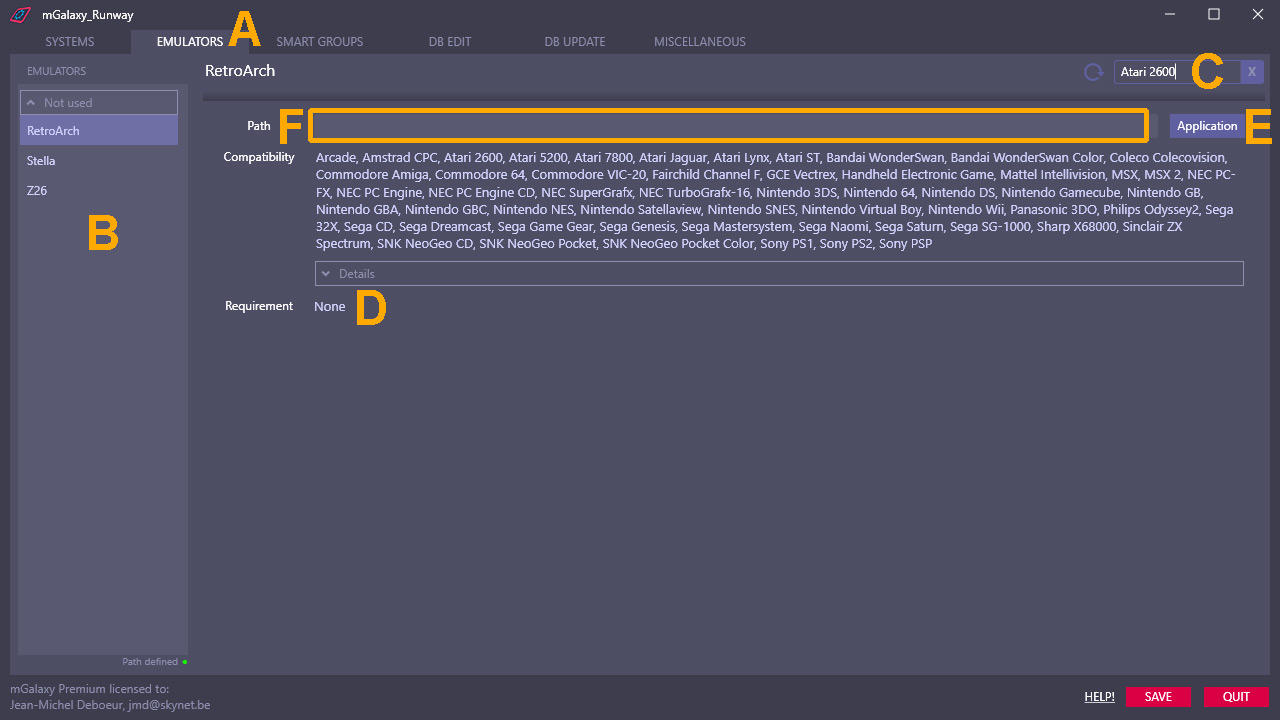
- Click on the “EMULATORS” tab [A]
- In the left column, all emulators recognized by mGalaxy [B]
- We will limit the display of emulators to the system we have chosen, the Atari 2600. To do this, in the field reserved for filtering, type “Atari 2600” [C] Tip: note that this filter field works for both emulator names and system names.
- The list is now reduced to 3 emulators. It is among these 3 emulators that we will make our choice later. The important thing here – and this is the reason why we went through this step – is to check in the requirements that there is nothing special to know for the proper functioning of this emulator. [D]
- clicking on this button to open a selection window [E]
- dragging/dropping the application directly into the field [F]
- typing the path directly in the field [F]
Last step #
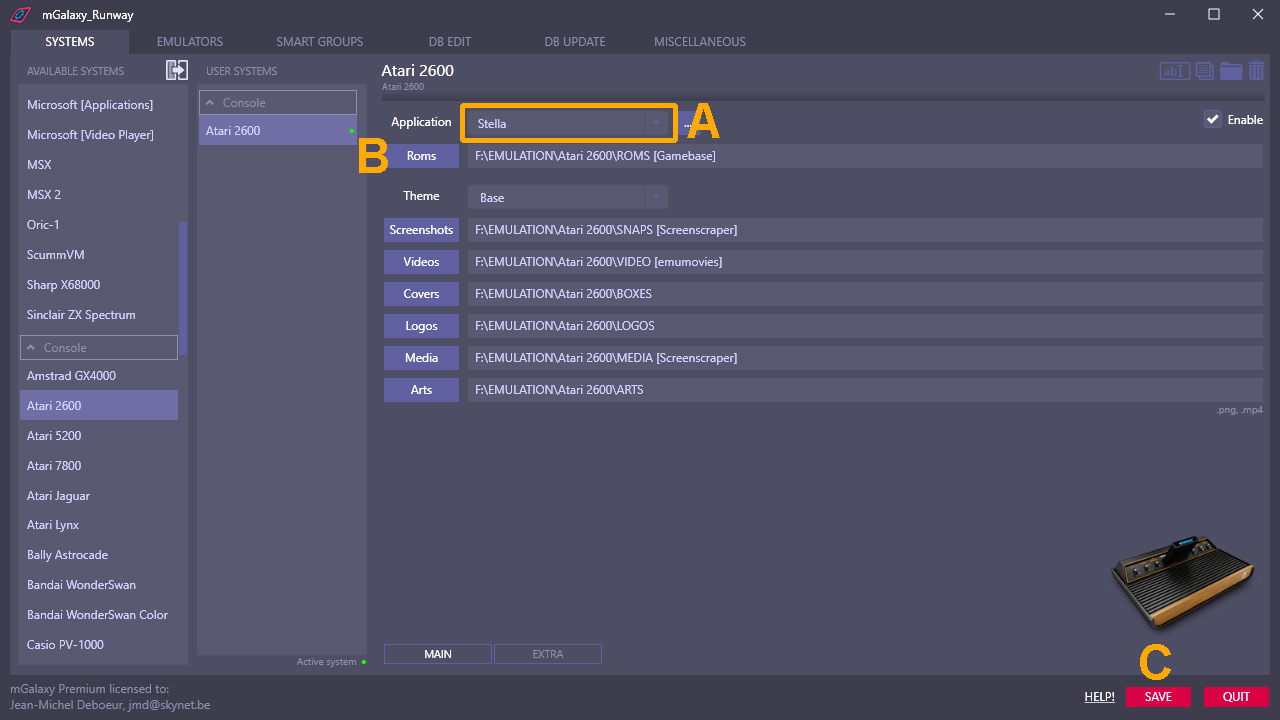 The emulator being known and the path being defined, back in the “SYSTEMS” tab, it only remains to make the choice in the drop-down menu.[A]
To finish, set the path to the folder containing your games and incidentally the various folders containing images, video, … [B] (there too by clicking on the button or dragging/dropping or typing the path) and save [C]
The emulator being known and the path being defined, back in the “SYSTEMS” tab, it only remains to make the choice in the drop-down menu.[A]
To finish, set the path to the folder containing your games and incidentally the various folders containing images, video, … [B] (there too by clicking on the button or dragging/dropping or typing the path) and save [C]