
The “Systems” tab explained
Presentation of the interface
Section titled “Presentation of the interface”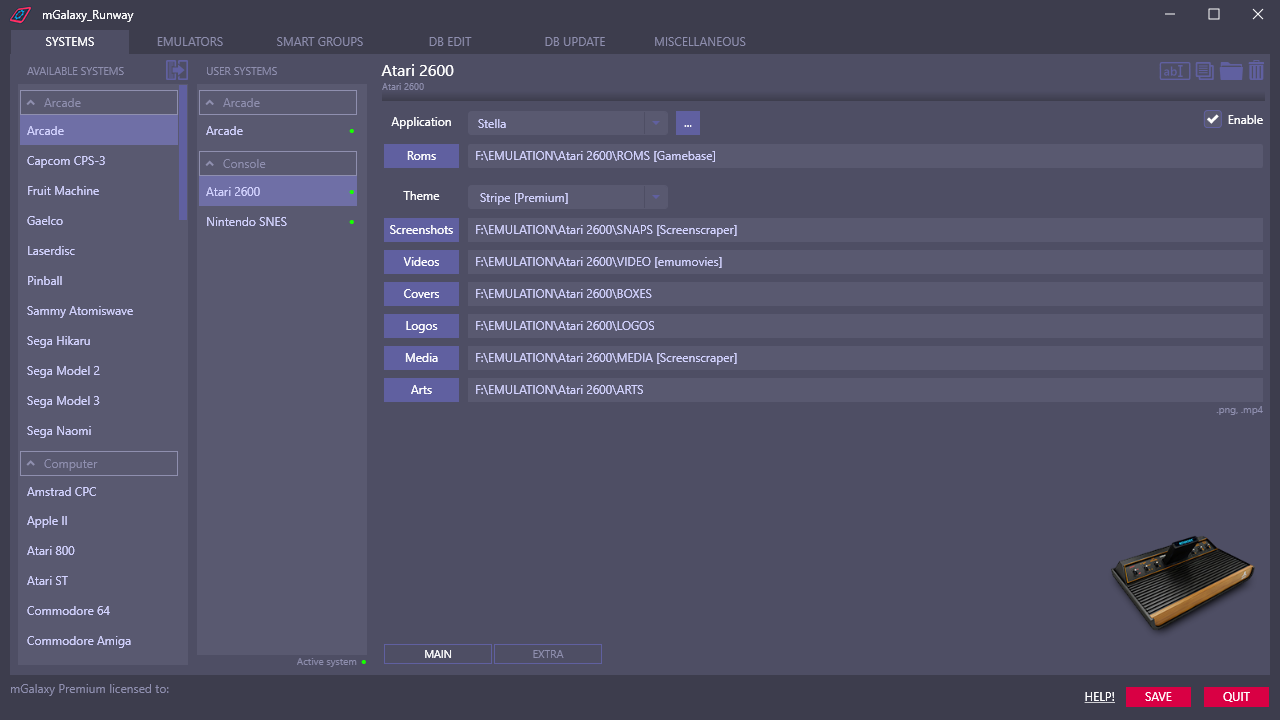 12345678
- Creation of a user system.
The parent system (left column) will be copied to the user systems (right column).
There are also other ways to create a user system:- by double-clicking on the parent system in the left column.
- by dragging/dropping the parent system from the left column to the right column.
- Indication of system activity/inactivity.
- Switches to the 'Emulator' tab and displays the features and settings of the selected emulator.
- System renaming.
- System duplication.
- Open the system folder in Windows Explorer.
- System removal.
- Toggle between 'Main' and 'Extra' information display.
- Theme selector.
- Enable/disable the selected system.
- The path to the emulator and folders can be filled in 3 ways:
- by clicking on the corresponding button to open a dialog box.
- by dragging/dropping the desktop file/folder to the corresponding field.
- by manually typing the full (or relative) path in the corresponding field.